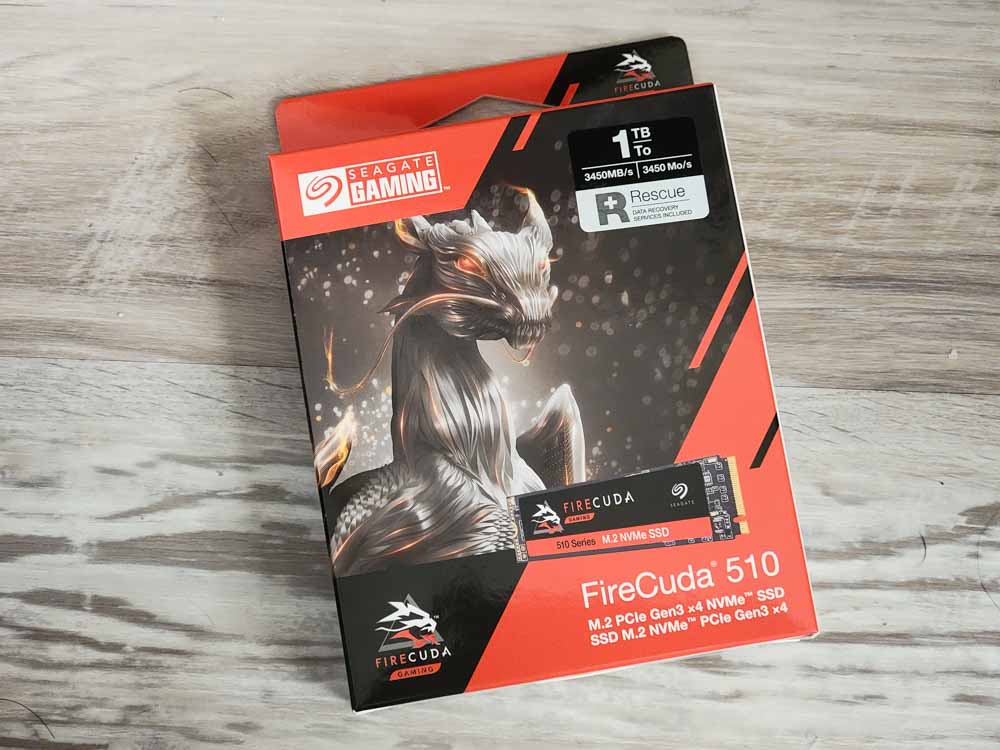

It’s been about two weeks now since having completed my personal gaming PC build. While the build itself is pretty much perfect for my needs, there’s always some room for improvement. One area I knew I would definitely need improvement on is storage. Currently by build only has 1TB of storage, which is already being filled up by Windows 10, several apps, and some games. That leaves little room for anything else. Luckily, Seagate came to the rescue and provided their excellent Seagate FireCuda 510, M.2 NVMe SSD in the 1TB configuration. However, instead of just adding this as a second drive, I decided to replace my current M.2 NVMe with this one because of the faster speeds and converting my original into a storage drive.
Disclaimer: Seagate sent us the Seagate FireCuda 510 M.2 NVMe SSD in the retail package.

INSTALLATION PROCESS
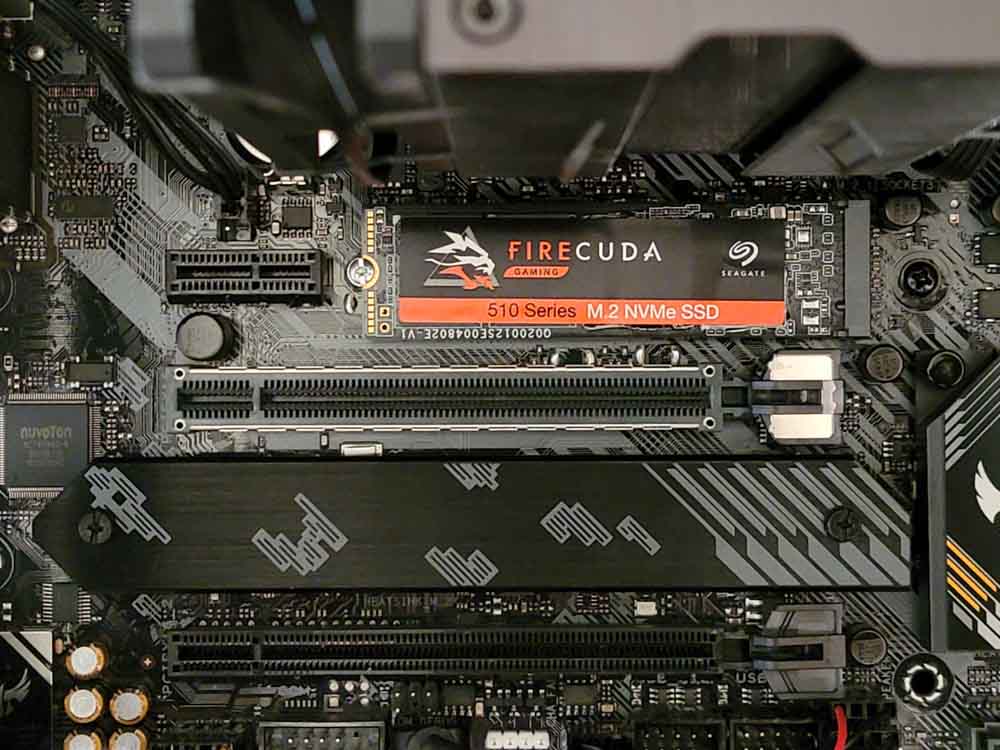
This might not be the case for you, but because my build was centered around such a small case, my first task required some disassembly. Mainly I had to pull the cover off my case as well as the bottom, unscrew the bottom fan mount, and remove my GPU. The GPU had to be removed because it covers up the second M.2 slot and makes it easier to access the first M.2 slot. 3
Instead of just leaving my original M.2 NVMe where it was, I moved it to the second slot under the heatsink and put the new Seagate FireCuda 510 M.2 NVMe SSD into the first slot. While not necessary really to do that, I did it for aesthetic reasons because the new Seagate FireCude 510 has a black colored board on it which matches up better with the Asus TUF-Gaming board color scheme.
Anyways, on the Asus TUF-Gaming board (mATX), the second M.2 slot has a heat shield that I needed to remove in order to install my original NVMe. Make sure you have an extra riser and screw because the FireCuda did not come with one, so you’ll probably need to dig through your old motherboard box to find one if you still have it. After that, just remove the protective film on the back of the heat sink and just reinstall it over the M.2 NVMe.
After both M.2 NVMe were in, I just put my computer back together again and booted it up as normal. The boot drive here was still my original drive and now, I’ll be going through the process of cloning my original drive onto the Seagate FireCuda 510. For this, I downloaded Seagates own Seagate DiskWizard app for the cloning process. This piece of software allows for many different functions, but the only thing I’ll be using it for is cloning.
The process is fairly simple where you just choose the source disk and then the destination disk and that’s pretty much it. The rest of the process is fairly automatic and quick since I was cloning from one NVMe to another. Once complete, I shut down my PC and then rebooted it into my BIOS to make sure I now had two drives, and one was the new Seagate FireCuda 510. I made that my new boot drive and proceeded to restart back into Windows 10.

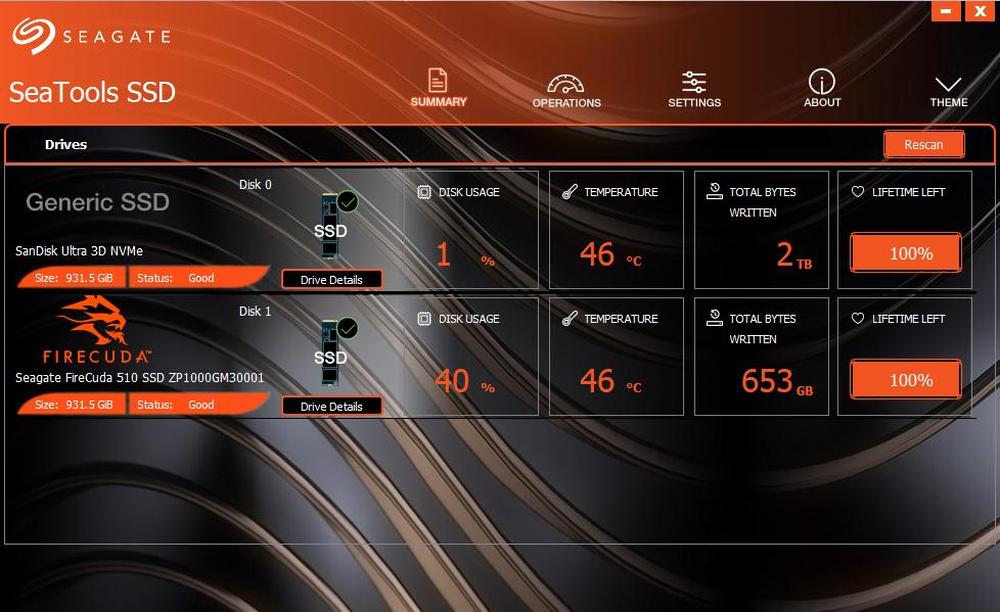
In Windows 10, I used File Explorer to check that both drives showed up as the C and D drives. I was able to verify in Disk Management that the Seagate FireCuda 510 showed up as Disk 1 and my old drive was Disk 0. Using Seagate’s SeaTools SSD, I was also able to verify that Disk 1 was the FireCuda 510 and my original was Disk 0.
I played around for a bit just to make sure a lot of my apps were working and that all my files were still there before reformating my original drive. The process of reformating wasn’t too difficult as all I had to do was head into File Explorer, right-click on the D drive, and press format. Make sure you use the “quick format” option as using the full format option could reduce the life of your drive.
After that, did a quick restart just to make sure I was all good still, and I was.
The last step was to move all my documents over to the second drive which is a fairly simple process as well as having folders like Documents, Videos, Pictures, etc all point to my new storage drive location.

SPEED AND PERFORMANCE
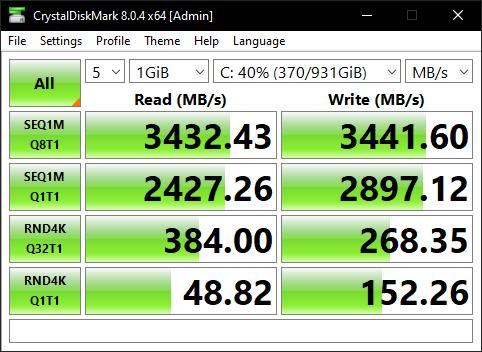
While I thought my original NVMe SSD was fast, the Seagate FireCuda 510 is much faster and is marketed towards gamers. That’s basically the main reason I chose to swap it as my main drive for my OS and games. For benchmarking, I used an app called CrystalDiskMark to test read and write speeds. As a refresher, my test computer is running an AMD Ryzen 5600G, 32GB RAM @ 3200 CL16, and has an NVIDIA RTX 3070 FE.
Now I’m not going to pretend like I even know what CrystalDiskMark is testing for, but here’s a site that at least explains a bit what each test is testing for.
Basically, the first test SEQ1M Q8T1, it is testing the sequential read and write speeds of large files, but with eight processes in the queue. As you can see from the results, it thoroughly bested my original drive. The same goes for the second test of SEQ1M Q1T1. This is also a sequential read and write test for large files, but with only one process in the queue.
It isn’t until we come to the third test called RND4K Q32T16 that something interesting happens. This is a test that will read and write data from 14 blocks of 4 kibibytes size with 32 processes in the queue on 16 threads. I don’t really understand what this means, but basically, my original drive here is faster.
Lastly, the RND4K Q1T1 is the same test as above, but with only one process in the queue on one thread. Here, the Seagate FireCuda 510 was faster again.
So does any of this really matter? For gaming, the faster your drive is, the faster you’ll be able to load into the game. That’s about it. Basically, it means less wait time for you which as a gamer, load times can be very annoying. All I know is I barely have to wait from the moment I launch a game to the moment it actually loads up.
Also, using SeaToolsSSD to monitor both NVMe SSD drives, even though I didn’t use a heat sink with the Seagate FireCuda 510, temperatures are not that far off from my other NVMe SSD that is sitting under a heat sink. They’re usually about the same or a couple degrees off from each other so we’ll count that as a win.

FINAL THOUGHTS
As a long-time PC user and gamer, one of the most annoying things is load times and transfer times. Being strictly a console gamer for much of my life, load times were always pretty terrible. Having to wait minutes sometimes for a game to load before you could start enjoying them was not fun. That’s something I did not want to experience with my new gaming PC setup which is why I went with M.2 NVMe storage drives. While my last one was pretty fast already, the Seagate FireCuda 510 is even faster. I should point out that the Seagate Firecuda 510 is only a PCIe Gen 3 x4, so while not quite as fast as current Gen 4 drives, it’s plenty fast for my needs.
I should note that the version of this Seagate FireCuda 510 has the designation: ZP1000GM30001 on it and was manufactured on 12/2020. A quick look on Amazon shows that the designation is now ZP1000GM3A011 for the black colored board and ZP1000GM30011 for the blue colored board. Not sure if there are any differences between these new numbers and the older number I was sent.
The Seagate FireCuda 510 includes 3-years of Rescue Data Recovery Servies as well as a 5-year limited warranty.
You can grab yourself your very own Seagate FireCuda 510 1T NVMe here on Amazon.
