
It’s not a great time to be a gamer right now unless you already own a gaming console or gaming PC. Why is that? Let’s start with the current state of hardware thanks in large part to a pandemic I’m sure we’d all love to forget about. The PlayStation 5 and the Xbox One Series X have been out for almost an entire year now and you still can’t find any on store shelves. Gamers are forced to either pay ridiculously high prices from scalpers or try their luck standing in long lines before anyone is even up or glued to their screens in hopes of scoring a console drop.
The same thing is happening on the PC side of things, but with them, it’s a shortage of video graphic cards (GPU). This is also a combination of many different factors. The pandemic is one of them and another being those dreaded crypto miners. Crypto miners are literally buying GPUs in huge quantities and normal folks like you and I can’t even buy them. PC gamers and those looking to build a computer are forced to pay scalpers prices that don’t make sense in the real world. A $400 RTX 3060 Ti now costs you around $1200 and that’s just crazy.
While these situations are indeed inconvenient, there is hope. For those who want to get into PC gaming right now, you can actually build yourself a decent system without having to buy a GPU that will get you started on the path, at least until you can find a GPU at the correct prices.
MAKE A PLAN, KNOW YOUR ROUTE
In my head, I had a firm budget of under $800, especially without a GPU. As much as I wanted to go all out and use all the best parts I possibly could, that wouldn’t have kept me anywhere near my budget, plus due to the way I game, I wouldn’t need a lot of those high-cost parts anyways. Let me explain.
I’ve been a console gamer most of my life but have dabbled in PC gaming from time to time. For me, gaming is about having fun, playing with friends, and getting away from the daily stresses of life when needed. I don’t really care about stuff like 4K resolution, crazy refresh rates, or insane frame rates that the human eye can’t even detect. That’s why I wanted a build that could handle most current games at least 1080p @ 60fps with the option to go high when the time came. Basically, that time would be when GPU prices came back down to reasonable levels.
So our plan was to go with the current AMD Ryzen 5600G or 5700G because these are the moment, the very best CPUs you can buy with integrated graphics (iGPU). It’s a Ryzen 5 or Ryzen 7 with Radeon Graphics baked in. From what I’ve read, these are Cezanne APUs with Zen 3 cores and the Radeon Vega graphics engine. Basically, these APUs are meant as a stopgap for gamers trying to wait out the ridiculous GPU shortages and rising prices from scalpers.
And that’s the plan. Build a Gaming PC that can handle 1080p gaming and at least 60fps that can be turbocharged later by just dropping in a GPU when it’s available.

SO WHAT WILL WE NEED?
For the most part, you’ll need everything a normal PC requires, just minus the GPU. Depending on what parts you opt for and what you’re trying to accomplish, this build can range from $500 to $1000 or more. This is because the price will be very dependent on what motherboard you use, what CPU you choose, how much memory you opt for to start with, the amount of storage you need, the power supply, and the case. As an example, I’ll list the parts we chose to go with for our build along with an alternative build that will be cheaper. The ultimate reason though for the parts we choose will be for some fair amount of future-proofing so we won’t need to re-buy certain parts again, at least not for the next several years.
*Note that the prices below are MSRP and for the most part, many of these parts are on sale so the prices will be much different. I suggest waiting for sales because prices fluctuate every day.
PARTS WE’VE CHOSE
- Case: SAMA IM01 Micro ATX Case – $69.99
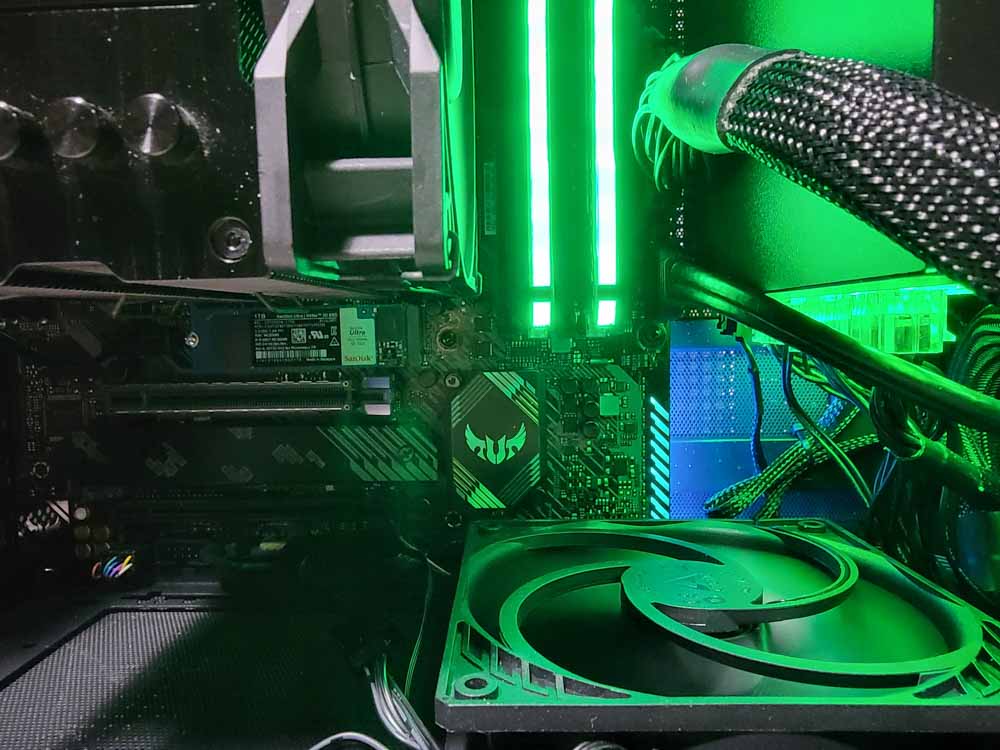
- Motherboard: Asus TUF GAMING B550-PLUS mATX AM4 Motherboard –
$169.99– $161.99 - CPU: AMD Ryzen 5600G APU –
$258.00– $229.00 - Cooler: be quiet! Pure Rock 2 CPU Cooler – $44.90
- Memory: Corsair Vengeance RGB Pro 16GB (2x8GB) DDR4-3200 CL16 –
$87.99– $74.99 - Storage: SanDisk Ultra 1TB PCIe NVMe SSD –
$94.99– $89.99 - Power Supply (PSU): Super Flower Leadex III ARGB 750W 80+ Gold –
$179.99– $109.99
ALTERNATIVE BUILD
- Case: Any
- Motherboard: GIGABYTE B550M DS3H Motherboard
- CPU: AMD Ryzen 5600G
- Cooler: (included)
- Memory: TEAMGROUP T-Force Vulcan Z DDR4 16GB Kit (2x8GB) 3600MHz
- Storage: WD_Blue 500GB SN550 NVMe SSD
- Power Supply (PSU): EVGA Super Nova 650 G5, 80 Plus Gold 650W
It’s important to note sizing when purchasing certain parts because this can have an adverse effect on pricing. Mini-ITX and full-sized ATX builds tend to be more expensive while micro-ATX builds can be more cost-effective. Also, I suggest choosing a PSU that is more than what you’ll require, mainly because future upgrades most definitely will require more power and the last thing you really want to do is re-buy a part over again because it wasn’t enough.
While the Alternative Build is cheaper, you could probably get this down some more with some sale prices or different brands as well. Same goes for my initial build. I listed both what MSRP was and what I actually paid for the part.
*All these parts for our build were purchased and not sponsored.

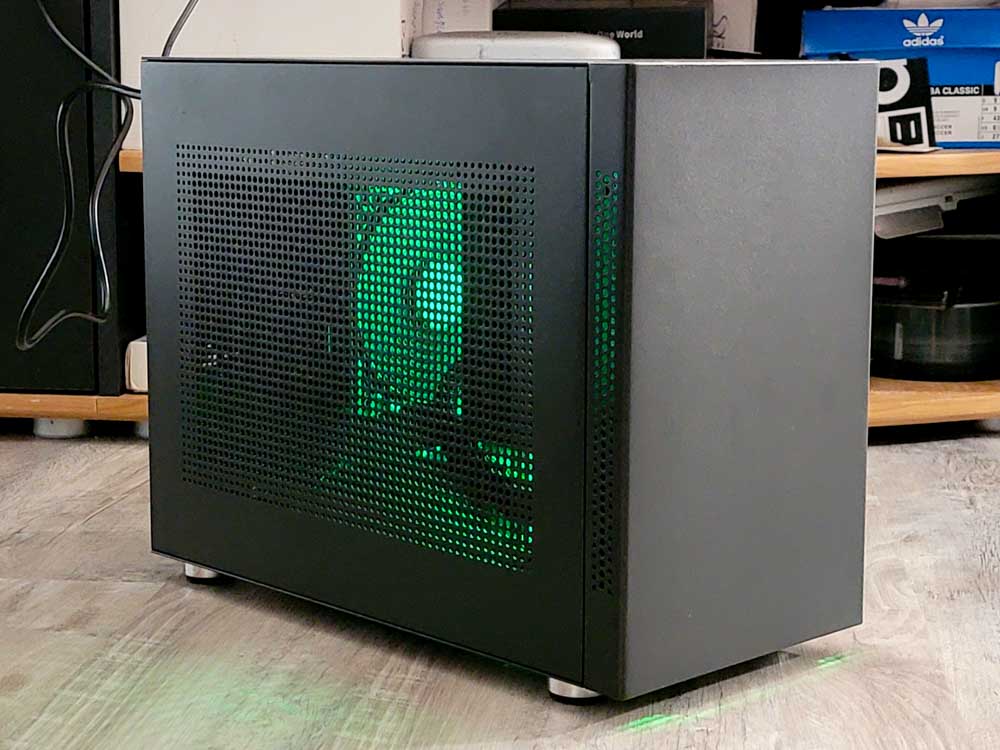
MICRO ATX SMALL FORM FACTOR
My plan was to build a small form factor PC. At first, I was considering going micro-ITX, but the cost of parts made it undesirable and the small selection of choices made it difficult to pick parts for. Not only that, you are very limited in terms of what you can do so I decided to go one size up to micro-ATX. At least this would allow for some extra expansion and more options. Not only that, parts were a bit cheaper and there were more cases to choose from.
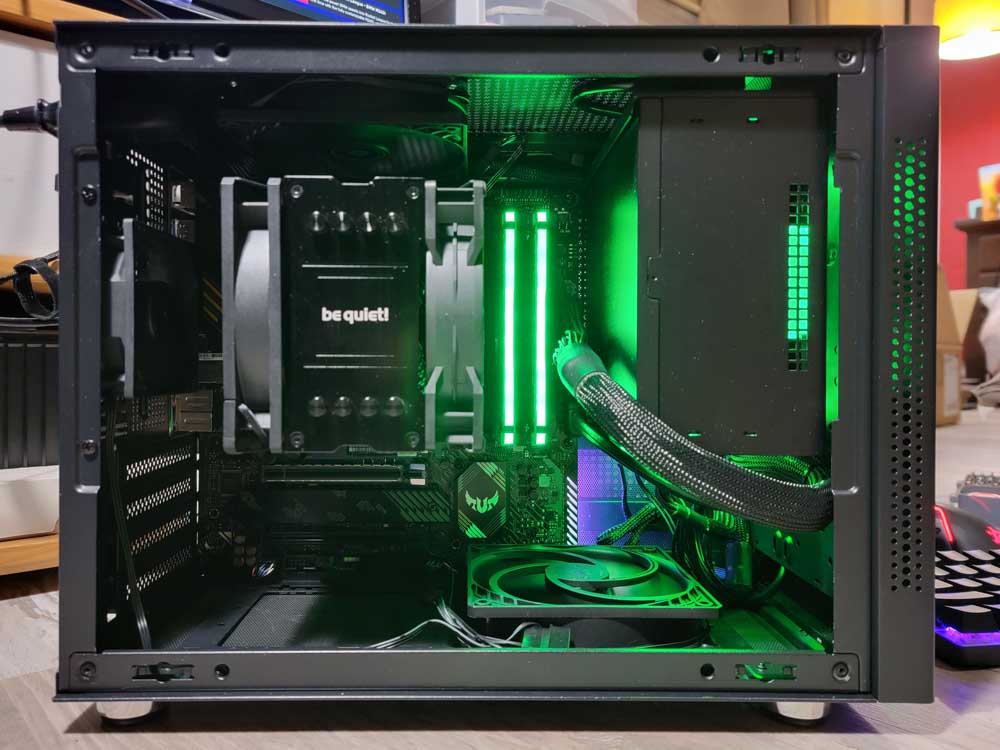
Still wanting to go small form factor though, I chose the smallest case I could find, which was the SAMA IM01. This case is very similar to the Cooler Master NR200 which I really wanted but could not get due to size limitations with the motherboard and PSU. The SAMA IM01 is very similar to the NR200 with almost the same exact layout and everything, just slightly larger.
I also chose to go small form factor just to see if I could do it and also to conserve some desktop space.

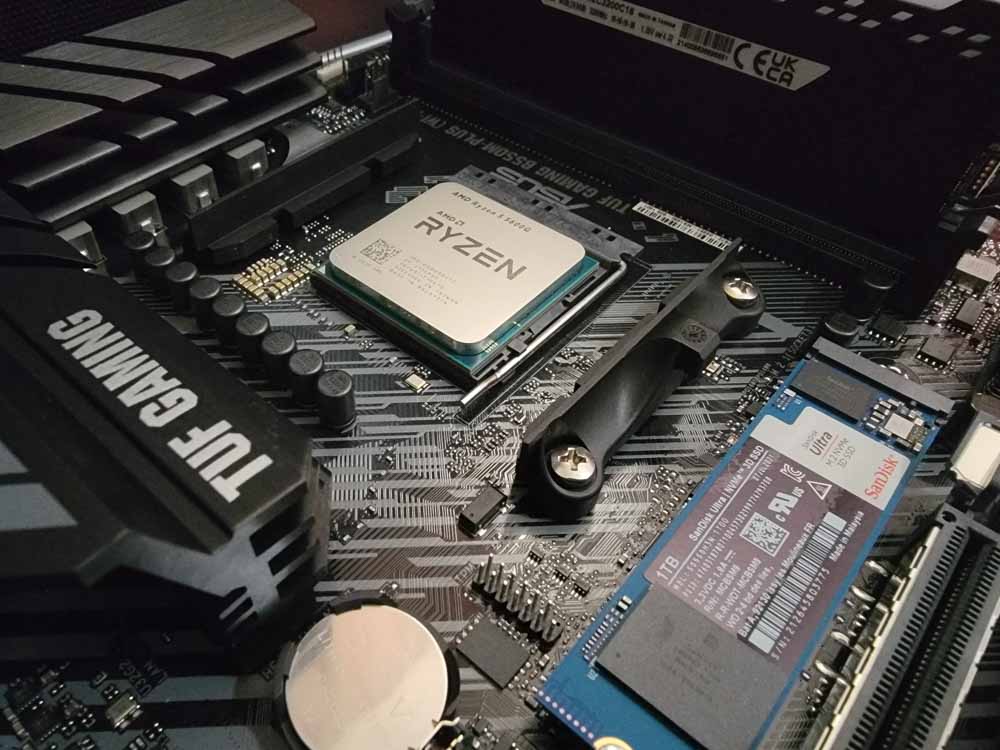
AMD RYZEN 5 5600G W/ INTEGRATED GRAPHICS
This is the heart of the build. Basically, this is one of the best CPUs right now that you can get with integrated graphics that won’t break the bank. While you can also go with the slightly more powerful Ryzen 7 5700G, it is about $100 more and we really wanted to keep the costs down as much as possible. Not only that, this CPU/APU comes with a CPU cooler already so you can forgo having to buy one, just as long as you don’t plan to overclock. Obviously, with this build in its current form, we won’t be doing any of that.
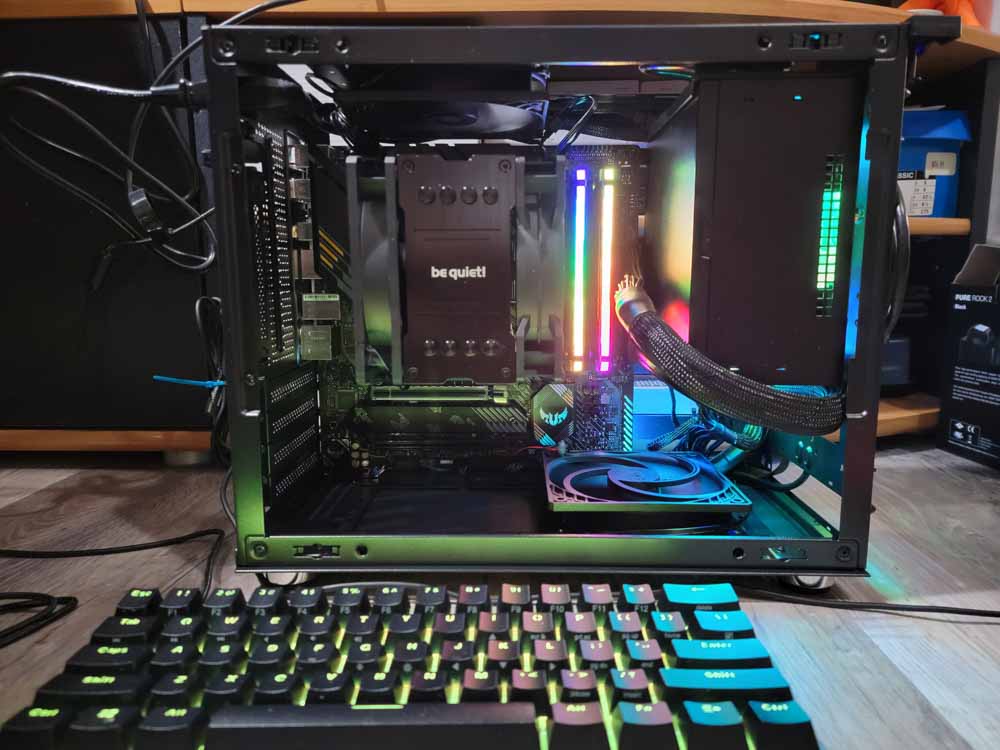
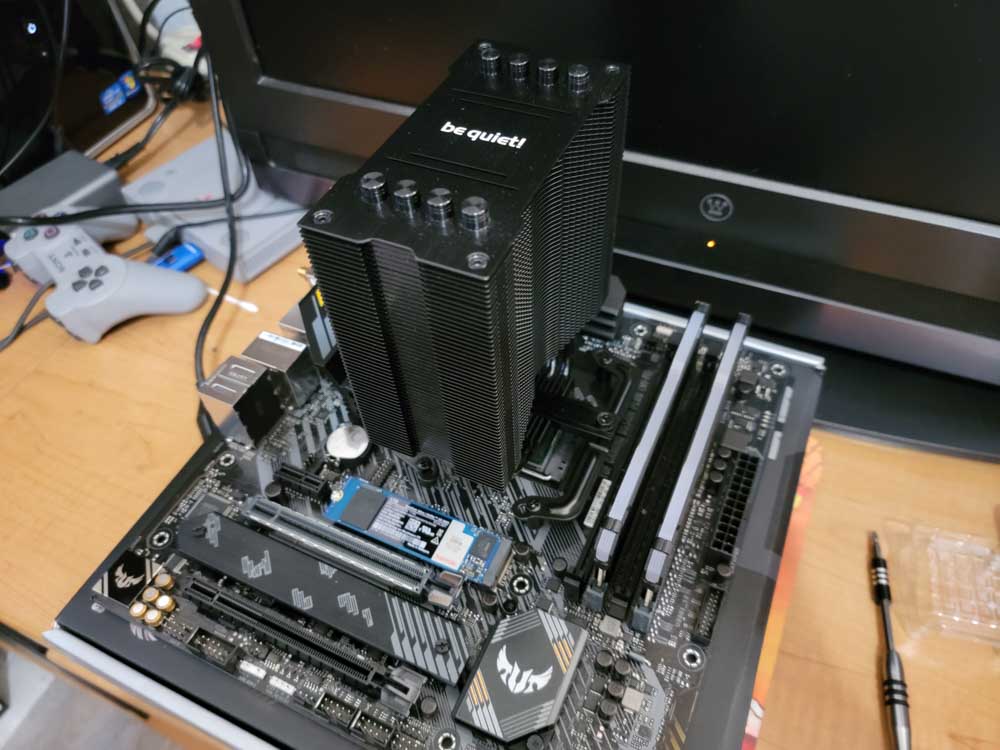
I did however choose to upgrade the CPU cooler anyways to a be Quiet! Pure Rock 2 unit. It just looks nicer and the huge radiator I would assume allows for better cooling. We’ll know later when we test everything.
With the motherboard, we chose to go with the B550 chipset which supports PCIe Gen 4. Even though we won’t be using that now, this at least gives us the option later down the line. We are also matting this with 16GB RAM (2x8GB) DDR4-3200 CL16. These seem to work well with the Ryzen architecture.

POWER REQUIREMENTS
We went a little overboard with the power requirements here and went with the Super Flower Leadex 750W 80+ Gold PSU. We did this because we will be upgrading this rig later down the line and didn’t want to have to buy another PSU if it didn’t meet our power requirements. Plus, this thing was on sale and I couldn’t pass up the deal. Super Flower from what I’ve read is one of the best brands for PSUs. If you don’t plan on adding a really heavy-duty GPU later, you could make do with something around 500W. That too will save you some money in the end.
STORAGE
For storage, we went with the Sandisk – Ultra 1TB PCIe NVMe SSD. This unit is actually the same exact thing as the WD_Blue 1TB SN550 NVMe SSD, just has a different sticker on it. We did this because it was on sale at our local Best Buy and also, going this route meant one less cable I would need to use. In the future, we might upgrade with another NVMe or a regular SSD drive just for storing files, but for now, the 1TB drive will do.
INSTALLATION
Building a computer from scratch can be very daunting. Meaning that if you don’t have experience doing it, you can get lost rather quickly. The motherboard manually helps a lot, but if you don’t understand all the terms in it, it might as well be written in Latin. I would suggest doing some research first or asking a friend to help you out if it’s your first time.
PRO TIP – I would suggest installing most parts outside of the case, at least the CPU, and RAM. This way, you can test the motherboard and parts before installing them into the case. Otherwise if there’s an issue, you’re going to be really upset that you need to pull it all out. Instead, test the motherboard, CPU, and RAM outside and just plug it into a monitor and the PSU. If it posts a picture, you’ll know it works.
I also suggest working outside of the case because it just makes installing some of these parts so much easier, especially if you’re working in a tight space. For me, a small form factor case is very small so anything I don’t have to do in the case is better. Luckily, the SAMA case is also very flexible and you can pull all the sides off to make it easier to work in.
What’s the order of parts you should install? I would say motherboard, CPU, RAM, and the M.2 storage if you’re using that. Next up, it’s up to you if you want to install the CPU cooler first or wait until it’s in the case to do it. If you have a liquid cooler, it’s probably better to do this in the case. If you’re running an air cooler, you can do this outside of the case. Also, make sure you’re using the right mounts. Sometimes it’s easier changing them out when the motherboard is outside of the case than when it’s in it. Once you do this, you can go about placing the motherboard into the case and screwing it down to the chassis.
VERY IMPORTANT – Don’t forget your thermal paste or thermal pad when installing the cooler to the CPU.
Lastly, just plug in the PSU to the necessary connectors and you’re virtually done. If you chose to use an SSD or 3.5″ drive, you’ll want to connect these too now. The same goes for any optional fans you might have. Make sure you read the booklet and see which are the correct headers for the correct parts.
THE CONCLUSION…FOR NOW
So once all your hardware is installed and wired up, you’ll need to power it up and install the software. We went with Windows 10 Pro and installed it via a USB boot drive. Once that’s done, you’ll want to go in and install all the necessary drivers and updates. Most of it is self-explanatory and automatic, but you’ll want to make sure that it installs all the latest drivers after. You’ll also want to install any other software that has to do with the parts you purchased.
That’s pretty much it and you’ll be good to go. If you want, you can clean up the build a bit and possibly do some cable management. It will go a long way to keeping your build tidy and making upgrades and future troubleshooting easier as well.
So in the end, we spent about $750 on this build, thanks to some generous deals and discounts. It is very possible to get this down to around $650 or less by choosing some other parts instead. Ours just cost this much so we could future-proof it for other upgrades we want to do soon. I would definitely check out pcpartpicker.com if you want to price out and plan a build.
Anyways, that’s the build for now. In its current state, it will allow you to game at 1080p and around 60fps, depending on the game. This isn’t going to blow any numbers out of the water, but it’s a really nice stopgap until you can find a proper GPU to boost its performance.
As of this posting, however, we were able to secure an NVIDIA RTX 3070 for this build. There will be a separate post about that upgrade soon.

