

So this review had been much delayed to the nature of the game. The original motorcycle we were going to use this on became no longer available and the replacement took a little bit of time to get in the house. Eventually, we got this in house and got in some ride time with the M1 motorsport cam in place. So let’s not waste any further time, let’s talk about it!
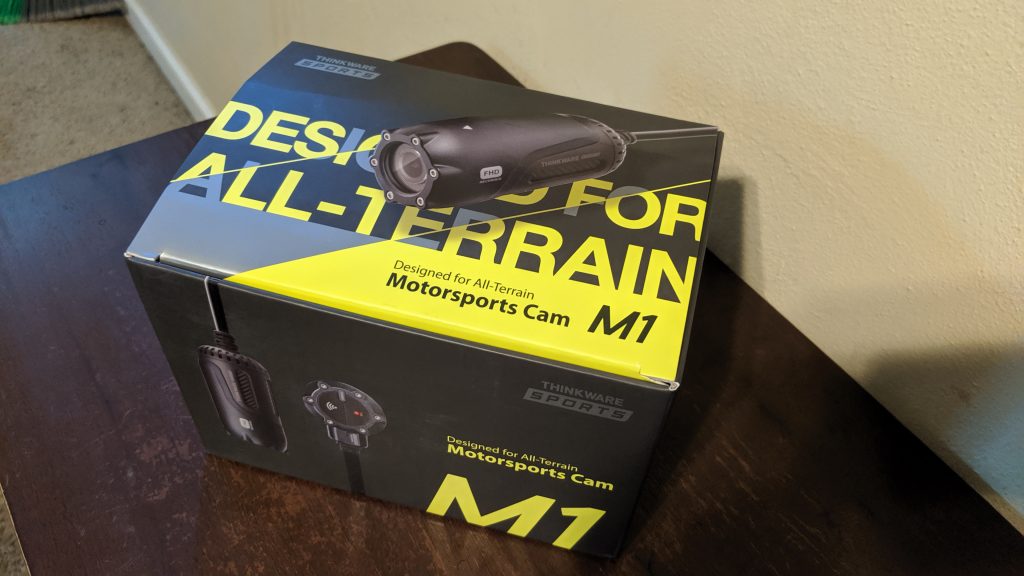
So we have definitely reviewed a few Thinkware products and dash cams, but then that has something that came in our laps that require someone with a 2 wheels option and as I most recently picked up the past time of riding on twos, this was sent my way. While riding on twos is still a fairly new past time for me, bring tech to two wheels is just a next extension of who I am So when I heard about the Thinkware M1 motorsports cam I jumped at the chance to try it out. The Thinkware M1 is a two-channel cam system with a front and back camera connected to the main unit which you could hide under your bike seat. This doesn’t run off batteries, so you’ll need to hook it up to your bike’s power and that is where the fun started. Before then I hadn’t even been under the seat of my previous bike, let alone this new one. But I was determined to figure this out. So let’s talk about the installation.
Install Process – Simple But Every Bike Is Different

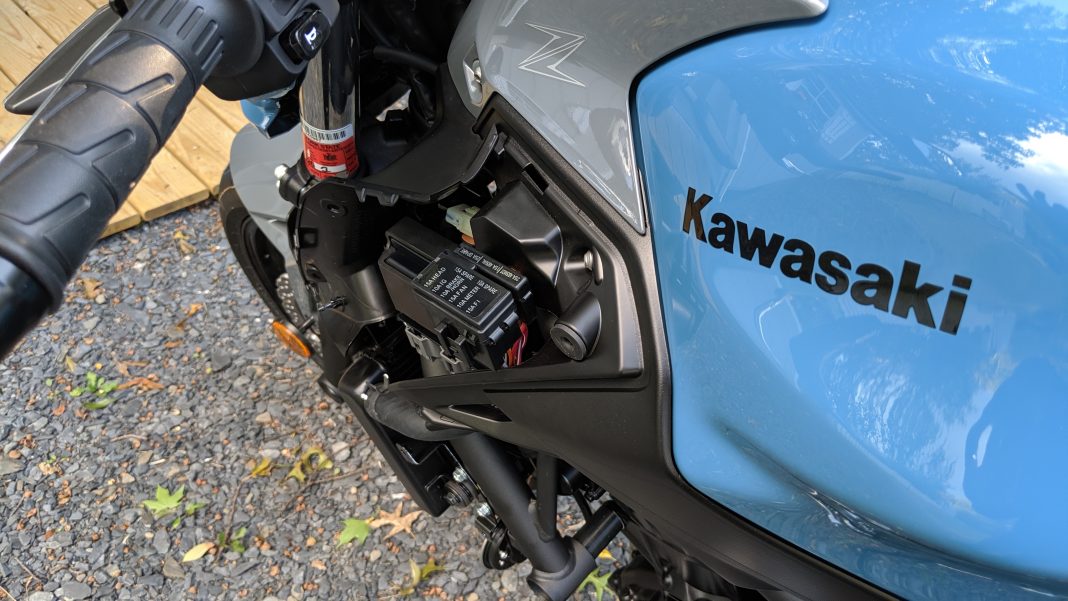
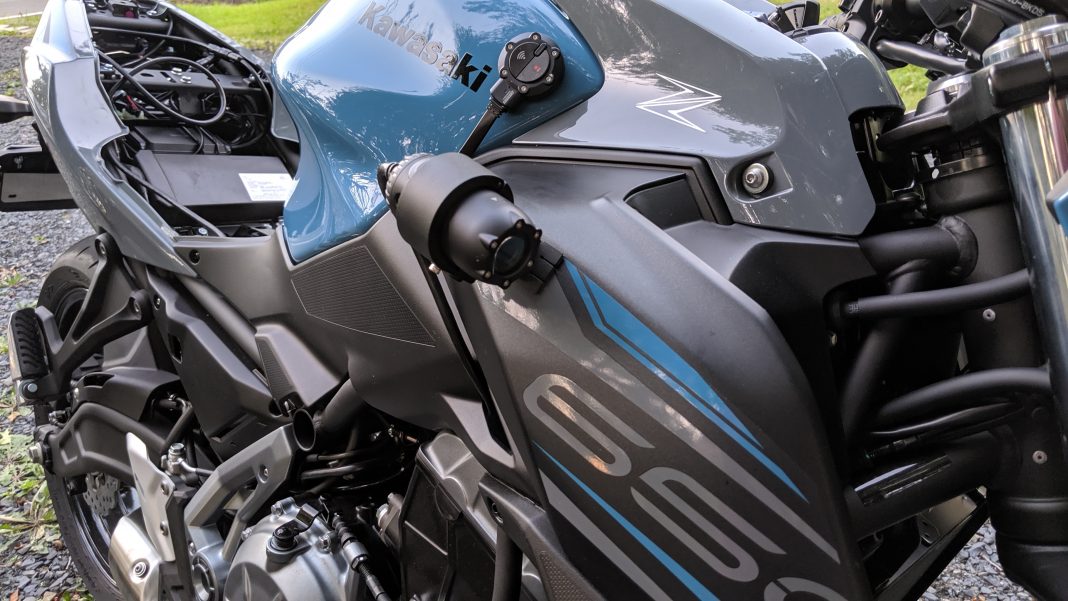
The M1 unit comes with all the pieces, cables, and material you need to get it installed. I also googled a few videos up and was able to find some get video directions as well. Depending on your bike this can be a fairly easy process with you hooking the cables for power to one of your accessory fuses by the battery under the seat…or if you’re lucky by me you find out your bike’s fuse box isn’t under your seat at all! This was my only struggle. The bike I was using for this is the 2019 Kawasaki Z650 ABS and the fuze box got this bike is located toward the front left side of the bike. This isn’t close to the battery at all, So I did have to get creative with the cable that needed to be grounded. There was a cable that needed to be connected to one of the accessory fuses and another to the black terminal of the battery to ground it. Directions called for it to be ground to a metal screw or bolt so I got creative here with it be wrapped around a metal nut closer to the fuse box.
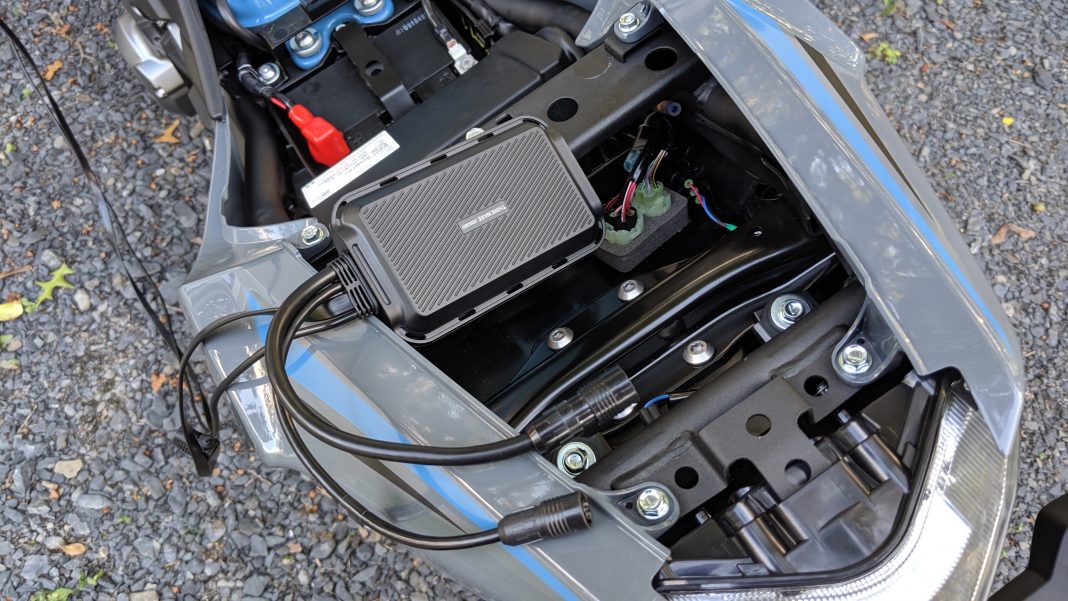
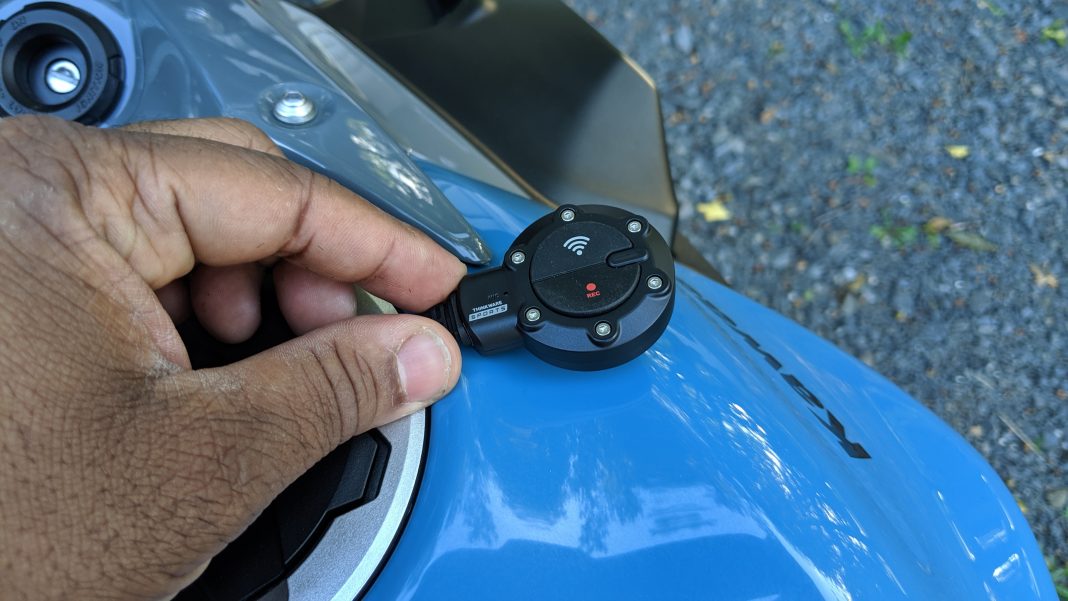
Once I solved this little configuration change, the majority of the remaining wiring was pretty straight forward. Once I had the locations picked up on where I wanted the camera, running the cables was simpler. The M1 camera cables are pretty lengthy, so you definitely have enough to mount where ever you desire. I chose the right front side of the bike for the front camera and the back fender directly centered in the middle for the back. After applying the 3M provided adhesive, and pressing the camera into place for about 30 seconds I was good to go. The entire process took me about an hour, your time can be quicker the more familiar you are with your bike. I mounted the cameras, and then mount the control button toward the front right side as well. And lastly, I position the main unit right under the seat in a look nook that was perfect for it. Now since the unit was power but an accessory fuse, when I turned on the bike it would start recording and it would stop when the bike was off. With this setup, there would be no battery drainage when the bike was off.


Just Turn On And Ride
Was this was all set up, the best part about it is not having to give it thought to it. You simply turn on your bike and just ride your ride. No worrying activating the camera, start/stopping it. You just focus on the ride and then after check to see what you captured. With a two-channel system, you capture the action both in the front and back of you. You can use this as a great way to capture any evidence if god forbid you were in an accident or use it to capture some cool footage of the ride and anyone with you if you were on a joint or group ride. I used it mainly to try and capture some cool footage of some of my trips both solo and with a few friends. Nice and easy way to capture something to share on social media without the distraction while you ride.

I will say camera placement is key though. The location of the front camera was on my front right side and for the most part, caught good footage, but you definitely couldn’t see anything on the left front side. If you want a nice overall front action, you’ll want to maybe place it may be more center on a windshield or another spot with room enough to play the adhesive and mount. After mounting the front camera, I really didn’t want to take it off and remount, but if you find yourself in this situation the unit does come with one additional set of 3M adhesives.
App Control And A Few Negatives
The M1 motorsports camera does come with an app you can download for both iOS and Android, and it is a fairly simple app. You can unit to make some setting changes with the camera, format the microSD card, and use it to see a live view from the camera. The live view part is really good when you want to align the camera to be level with the horizon. Beyond this, there isn’t much you’ll need the app for. When it comes time to collect the footage you can either take out the SD card to use the provided microSD to USB type A adapter (which is great that they provided this, I’ve been using this both for the M1 SD and other microSD cards I have. It’s become the default adapter I use for all my SD cards now!) or using the app you can send some footage straight to your phone.
Once you have gotten the footage, this is where some of the negatives come. Most of my annoyances with the M1 cam is going through the footage after the fact. The M1 segments its recordings in two ways continuous and manual. When you turn the bike on it is automatically recording in continuous mode. This seems to me to make the manual recording mode in which you press the button on the controller to activate it useless if it is always recording anyway. Both modes recording in one-minute blocks. So whether continuously or manual, you are only getting footage in one-minute increments. And this can be a pain if you want to go through footage from say an hour or more group ride. It literally becomes so many files you have to go through to piece together the ride minute by minute.
Which leads me to my next annoyance. The Thinkware watermark that gets imposed on the footage (you’ll see this if you skip to the 1:00 mark). Maybe it’s me and I just haven’t found it, but I swear I’ve looked through all the settings and couldn’t find a way to turn that off. So if I’m editing footage for a said group ride and I’ve been out there for an hour, not only is that 60 minute by minute clips to piece together, not I need to remove the watermark for 60 clips. Now, remember, this is a two-channel system, front, and back. So that is 120 clips to look through if I want to create a nice video showing both front and behind me, which also means 120 clips to remove the watermark from. I need the option to remove this watermark! Again maybe I missed somewhere and if you have the M1 and know please comment and share. But this has made editing footage later quite the lengthy chore. I’ll see in some of my videos here, sometimes you’ll see the watermark and sometimes not as I got tired of editing the clips to remove it haha.
Is It Worth It?
Despite a few negatives, the Thinkware M1 Motorsport cam is a sweet device. And it is one that is quite expensive as well. Regular cost for it is $599.99 but you might find it cheaper with various sales or at various retailers. But at $599.99 is it worth the cost? I would say yes but only with a few conditions. One if there is a way to remove the watermark then yes. If you currently can’t but maybe if with they say with an upcoming firmware upgrade you’ll have that option then okay yes. And two also if they can provide a future firmware upgrade that the pressing of the manual mode button would allow for you to shoot for more than one minute. increment, then yes again.
But if it can’t meet these conditions I would have to say no. For the ease of use while riding and capturing footage, it gets ruin with the time you’ll have to spend later when it is time to edit and put together the footage. Now if you want to just use it as a safety thing to capture evidence in the event of an accident, I would say if you can it for $400 – $450 go for it. At $599.99 it is pretty steep and I probably wouldn’t pick it up for that price.
