I’m a fan of the Micro Four Thirds cameras coming from Olympus but did you also know that Panasonic makes some really good cameras based on this standard as well? Currently, Panasonic has 3 Micro Four Thirds cameras in their lineup, all under their Lumix brand. There is the high end Lumix DMC-GX1, the entry level DMC-GF3, and the camera I have in my possession right now, the Panasonic Lumix DMC-G3. Price wise, the G3 slots inbetween the GX1 and GF3, but has a more DSLR-like look to it and includes an electronic viewfinder and a flip-out swivel touchscreen. If you want a Micro Four Thirds camera from Panasonic that has an EVF, the G3 is the one to get unless you go for the GX1 and get the optional EVF which will cost you more money.
Build and Layout
 The Lumix G3 is a solidly built camera with a full metal face. The rest of the camera however is covered in plastic. The unit Panasonic sent to me is all matte black and because of this, it’s a bit hard to distinguish the metal bits from the plastic bits and makes the entire camera look very plastic-like. That however doesn’t affect the quality of the build however as the entire camera feels very solid and has good weight too it.
Let’s start with the front of the DMC-G3. On the left side, Panasonic still retains a nice little hand grip, something which Olympus has removed from their current PEN cameras. Some people don’t mind not having a grip there but for me personally, I appreciate having the grip there as it allows for more comfortable shooting and gives you a better hold on the camera. The grip also has a nice soft touch coating to it which helps with the grip. On the upper right corner of the camera is the AF assist light which is a good place for it as your hands stay relatively out of the way from it. The kit lens that comes with the G3 is a 14-42mm f/3.5-5.6 G Vario lens. It’s much larger than the lens that comes on the E-PL3 but a tiny bit shorter than the NEX-5N kit lens. It has a separate manual focusing ring as well as the zoom ring. The focusing ring turns quite smoothly but the zoom ring doesn’t turn quite as smoothly as I’d like it to.
Moving the G3 clockwise, we can see that there isn’t much on this side of the camera. All you’ll find is 1 of 2 neck-strap eyelets and part of the hinge for the flip out touchscreen.
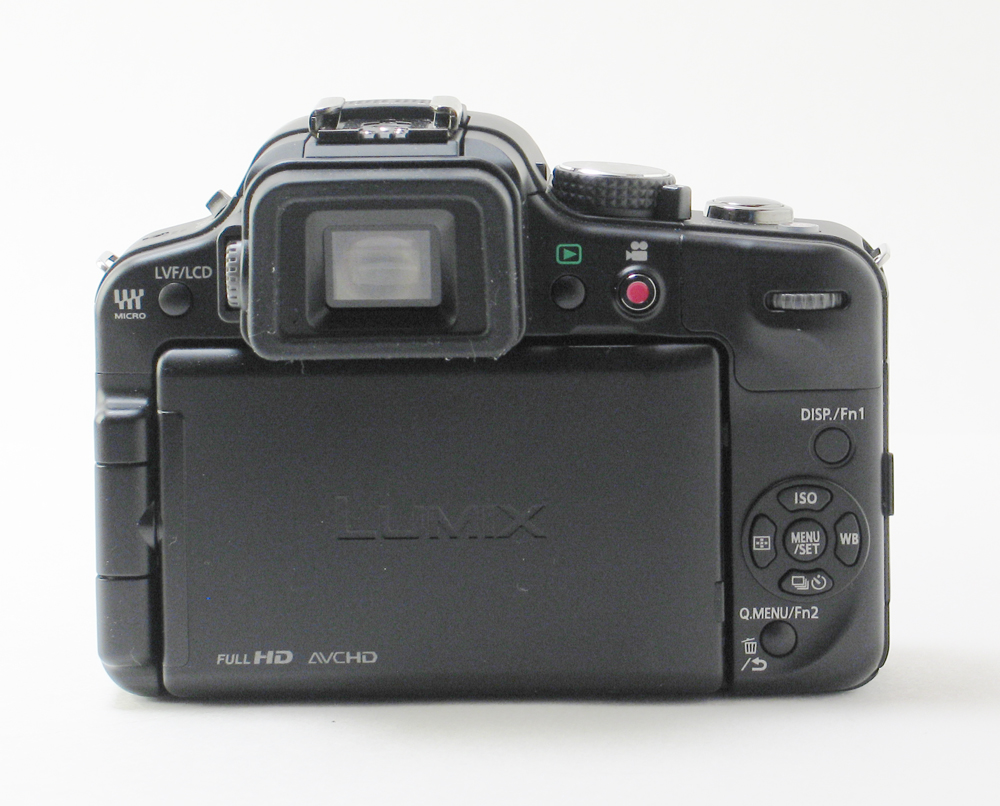
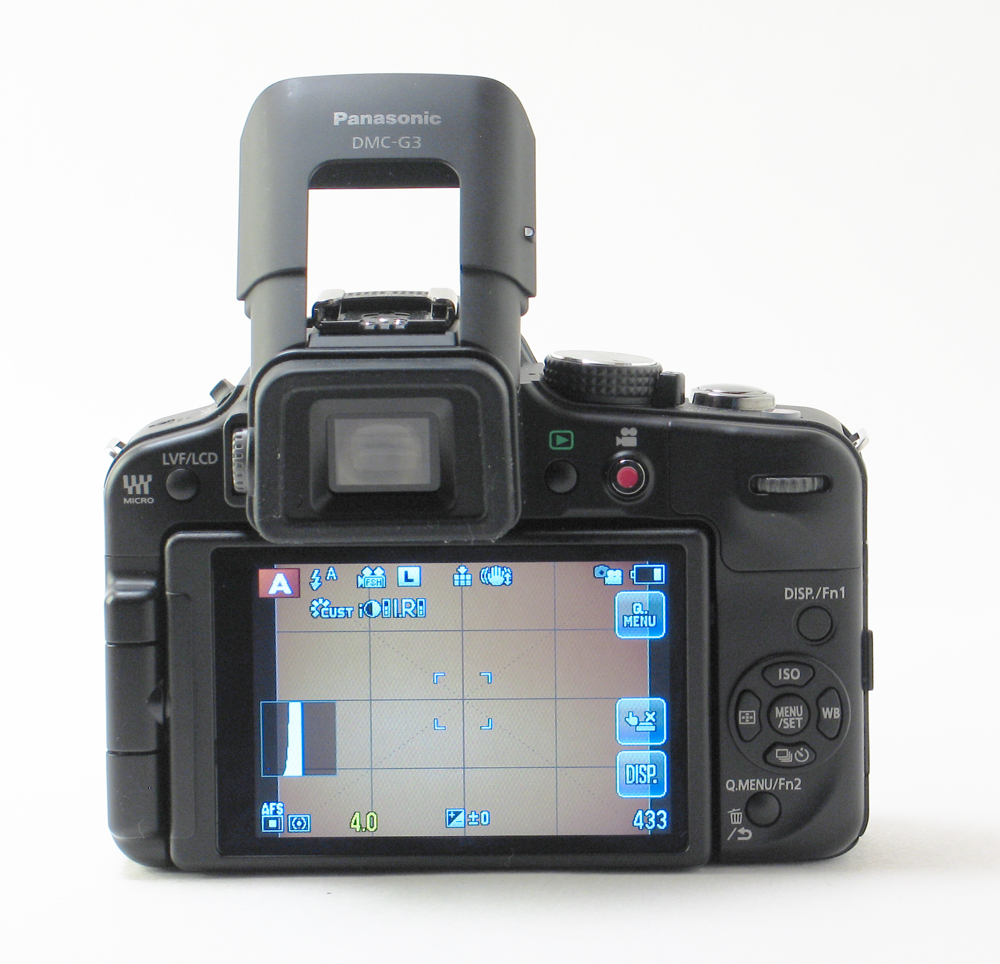
 On the back of the camera is where you’ll spend most of your time with the camera. The articulating touchscreen takes up the most space on the back of the camera. It’s a side hinged screen which means you can rotate it all the way around and see yourself with the lens pointed at you. It also means you can take photos with the camera pointed left or right as well as up or down. It’s quite versatile however it does seem a bit fragile compared to the Sony NEX-5N and the Olympus PEN E-PL3 that we reviewed here in the past. Then hinged out, there can be a bit of give to the hinge and almost feels like you could snap it backwards and break it if you give it just a bit of force. The only good thing about the way the screen is hinged is that it can rotate around and close so that it isn’t exposed when in storage.
 On top of the screen you’ll find the electronic viewfinder and on top of that, the hotshoe mount. If you look to the left of the electronic viewfinder, you’ll see the button marked LVF/LCD. What this does is switch your view from the viewfinder to the LCD and vice-versa. You only use this if the LCD is flipped open. The rest of the buttons on the right said are pretty standard. The layout is similar to that of the PEN E-PL3 except that the G3 has a rear dial where there the thumb grip is. This makes it more natural to adjust certain functions as it is in easy reach of your thumb.
Rotating the camera clockwise once again and on this side is where we find the plastic door that hides all the little ports and sockets.
Now taking a look at the top of the camera, you’ll find lots of goodies to mess around with up here too. On the left side is the flash release switch that makes the built in flash pop up. Next to that you’ll find the popup flash, the stereo microphones, and the hotshoe. To the right of the flash is the mode selection dial combined with the on/off toggle switch. I’m glad to see that the G3 has the mode selection dial since it makes it that much easier to select the mode you want to be in. Next to that is the shutter release button which is a generous size and the iA button which lets you quickly switch between the default mode you have set and the iAuto mode.
Final Thoughts
Based on the initial examination of the Lumix DMC-G3, I can say that it seems to be a very solid camera. Build quality seems quite well except for the flip-out articulating touchscreen which can be broken off if you’re not careful. This however is very similar to many other DSLRs so it’s not anything new. You just need to be weary of this when using it. The rubber surround around the EVF is also a major dust/lint magnet. I’ve only had the camera for a few days and I’ve had to clean this thing many times already. It’s just a minor annoyance and doesn’t affect the way the camera functions. With the kit lens, the DMC-G3 is not a small camera. It looks like a tiny DSLR and requires that you carry it around in a case. The built in EVF also extends out quite a bit in the rear so this also adds to the overall bulk of the camera.
The DMC-G3 however is very easy to handle thanks to the comfortable hand grip and button layout. I also like the fact that the tripod mount hole is lined up with the center of the lens instead of directly in the center of the camera like on some other models. Again, the G3 is a very sturdy feeling camera and very DSLR like thanks to the EVF, it’s just much smaller than a full size DSLR.
Stay tuned over the next few days as there will be a full review posted as well as sample shots taken with the Panasonic Lumix DMC-G3.